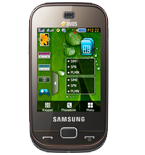
Sauvegarder contacts, calendrier, tâches et notes depuis Samsung GT-B5722

Available guides for synchronization to the secure cloud
Supported functions
- synchronisation des contacts
- synchronisation du calendrier
- synchronisation des tâches
- synchronisation des notes
Samsung GT-B5722 est pris en charge avec PhoneCopy. Veuillez noter que les paramètres suivants peuvent varier légèrement en fonction de la version du micrologiciel.
Confirmed models
Confirmed versions
Nouvelles
Samsung GT-B5722 utilisateurs dans le monde
Samsung GT-B5722 est privilégié pour la sauvegarde des contacts par les utilisateurs de PhoneCopy dans plusieurs pays du monde - Égypte (Misr, Masr, مصر) - 50.00%, Iran (Īrān, ایران) - 50.00%.
Sur la carte
L'histogramme illustre la sauvegarde de Samsung GT-B5722 avec PhoneCopy dans le monde entier.
Guide textuel - Comment sauvegarder
Avec Samsung GT-B5722
Guideline n'a pas encore été traduit dans votre langue.
First go to the phone's Main Menu and then follow these steps:
- Select Synchronize and choose Add.
- Configure given fields.
▼ hide fields
- Profile name: write PhoneCopy
- Synchronization category: Select the items you would like to synchronize. All will synchronize all items.
- Contacts
- to remote contacts write contacts, the rest can be left blank
- Plan
- to remote calendar write calendar, the rest can be left blank
- Task
- to remote task write tasks, the rest can be left blank
- Notes
- to remote notes write notes, the rest can be left blank
- Synchronization type: select Complete synchronization
- Synchronization server:
- Address
- write http://www.phonecopy.com/sync
- Login ID
- your_username
- Password
- your_password
- Save the data.
- Go to section Synchronise, select PhoneCopy profile and press OK to start the synchronization.
Et maintenant, veuillez assigner votre téléphone à votre compte PhoneCopy.
En cas de problemes dans la synchonisation, veuillez nous contacter.

