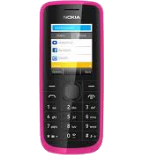
Backup контакты, календарь and записки from Nokia 110

Available guides for synchronization to the secure cloud
Supported functions
- contact synchronization
- calendar synchronization
- note synchronization
Nokia 110 is supported on PhoneCopy. Please note that following settings may vary a little depending on the firmware version.
Confirmed models
Confirmed versions
News
- 07.01.2020
- This phone model was just synchronized by PhoneCopy user in Pakistan. It transferred контакты.
- 17.11.2019
- We just got first user of Nokia 110 in Philippines! Someone just backed up his контакты from a new phone.
- 09.11.2019
- Someone used PhoneCopy for backup of this phone model in Nigeria. His контакты were transferred.
- A new phone user has synchronized his контакты to PhoneCopy from Bangladesh.
- 27.10.2019
- Someone used PhoneCopy for backup of this phone model in India. His контакты were transferred.
Nokia 110 users around the world
According to our statistics, PhoneCopy users use Nokia 110 for data backup in countries Kenya - 67.82%, India (Bharôt, ভাৰত, ভারত, Bhārat, ભારત, भारत, Bhārata, ಭಾರತ, Bhāratam, ഭാരതം, Bharôtô, ଭାରତ, ਭਾਰਤ, भारतम्, Bārata, பாரதம், Bhāratadēsam, భారత దేశం) - 22.84%, Bangladesh (বাংলাদেশ) - 3.81%, Pakistan (Pākistān, پاکستان) - 2.77%, Philippines (Pilipinas) - 1.38%, Somalia (Soomaaliya, aş-Şūmāl, الصومال) - 0.69%, Nigeria (Nijeriya, Naigeria, Nàìjíríà) - 0.69%.
On the map
Following heat map shows contacts synchronisations with Nokia 110 using PhoneCopy across the globe.
Text guideline - How to backup
With Nokia 110
- Choose Menu - Settings - Configuration - Personal config. sett..
- Press Options and choose Add new - Synchronization and configure given fields.
▼ hide fields
- Account name: Write PhoneCopy and press OK.
- Server address: Write http://www.phonecopy.com/sync and press OK.
- User name: your_username
- Password: your_password
- Contacts database: To Database address write contacts. Do not fill in any user name or password. Press Back.
- Calendar database: To Database address write calendar. Do not fill in any user name or password. Press Back.
- Notes database: To Database address write notes. Do not fill in any user name or password. Press Back.
- Use pref. access pt.: Choose Yes,If you want to use your preferred access point GPRS to connect to PhoneCopy. otherwise choose No, and set up the access point at your operator.
- Press Back, go to the name of the profile you have just created, and press Options and choose Activate.
- Press twice Back and choose Sync and backup - Data transfer.
- Find Server sync, press Options and choose Edit.
- Choose Synchronized data mark the items you want to synchronize and press Done or Back.
- Press twice Back.
- Now you can start the synchronization with Phonecopy, press Server sync.
If you need more help with the settings, visit our step by step screenshot guide.
And now please, assign your phone to your PhoneCopy account.
In the case of problems with synchronization, please contact us.

