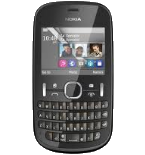
Nokia Asha 200 dan yedeklenen kişiler, takvim ve notlar

Available guides for synchronization to the secure cloud
Supported functions
- Kişiler senkronizasyonu
- Takvim senkronizasyonu
- Notlar senkronizasyonu
Nokia Asha 200 cihazını PhoneCopy desteklenmektedir. Please note that following settings may vary a little depending on the firmware version.
Confirmed models
Confirmed versions
News
- 7.07.2023
- We just got first user of this model in Philippines! Someone just backed up his kişiler.
- 28.03.2022
- We just got first user of Nokia Asha 200 in Morocco! Someone just backed up his kişiler from a new phone.
- 6.03.2021
- Even in Uganda we have a user with Nokia Asha 200 phone. He backs up his kişiler.
- 29.03.2020
- Even in India we have a user with Nokia Asha 200 phone. He backs up his kişiler.
- 18.03.2020
- We detected PhoneCopy app on Nokia Asha 200 phone in Iran. All kişiler were backed up.
Nokia Asha 200 users around the world
Nokia Asha 200 is often used by PhoneCopy users in countries like Ethiopia (Ityop'ia, ኢትዮጵያ) - 32.94%, India (Bharôt, ভাৰত, ভারত, Bhārat, ભારત, भारत, Bhārata, ಭಾರತ, Bhāratam, ഭാരതം, Bharôtô, ଭାରତ, ਭਾਰਤ, भारतम्, Bārata, பாரதம், Bhāratadēsam, భారత దేశం) - 23.53%, Nigeria (Nijeriya, Naigeria, Nàìjíríà) - 22.35%, Iran (Īrān, ایران) - 8.24%, Uganda - 7.06%, Egypt (Misr, Masr, مصر) - 2.35%, Morocco (Amerruk, Elmeɣrib, ⴰⵎⵔⵔⵓⴽ, ⵍⵎⵖⵔⵉⴱ, Al-maɣréb, المغرب) - 2.35%, Philippines (Pilipinas) - 1.18%.
On the map
Following heat map illustrates share between users around the world synchronizing their Nokia Asha 200 using PhoneCopy.
Talimat metni - Nasıl yedekleme yapılır
Nokia Asha 200 ile
- Choose Menu - Settings - Configuration - Personal config. sett..
- Press Options and choose Add new - Synchronization and configure given fields.
▼ hide fields
- Account name: Write PhoneCopy and press OK.
- Server address: Write http://www.phonecopy.com/sync and press OK.
- User name: your_username
- Password: your_password
- Contacts database: To Database address write contacts. Do not fill in any user name or password. Press Back.
- Calendar database: To Database address write calendar. Do not fill in any user name or password. Press Back.
- Notes database: To Database address write notes. Do not fill in any user name or password. Press Back.
- Use pref. access pt.: Choose Yes,If you want to use your preferred access point GPRS to connect to PhoneCopy. otherwise choose No, and set up the access point at your operator.
- Press Back, go to the name of the profile you have just created, and press Options and choose Activate.
- Press twice Back and choose Sync and backup - Data transfer.
- Find Server sync, press Options and choose Edit.
- Choose Synchronized data mark the items you want to synchronize and press Done or Back.
- Press twice Back.
- Now you can start the synchronization with Phonecopy, press Server sync.
If you need more help with the settings, visit our step by step screenshot guide.
Ve lütfen şimdi, Telefonunuzu PhoneCopy hesabınıza atama işlemini yapınız
Senkronizasyon esnasında herhangi bir problemle karşılaşırsanız Yardım İsteyin

