Nokia Asha 2055 dan yedeklenen kişiler, takvim ve notlar
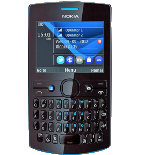
Güvenli buluta senkronizasyon için mevcut kılavuzlar
Desteklenen işlevler
- Kişiler senkronizasyonu
- Takvim senkronizasyonu
- Notlar senkronizasyonu

kişiler, takvim ve notlar verilerinizi Nokia Asha 2055 cihazından çevrimiçi bir depolama alanına ve geri aktararak güvende ve güncel tutun.
Nokia Asha 2055 cihazını PhoneCopy desteklenmektedir.
Lütfen aşağıdaki ayarların ürün yazılımı sürümüne bağlı olarak biraz değişebileceğini unutmayın.
Onaylanan modeller
Onaylanan sürümler
Haberler
- 19.08.2020
- Nokia Asha 2055 phone was synchronized by PhoneCopy user in Madagaskar. His kişiler were transferred.
- 19.02.2020
- Recently we got new user of Nokia Asha 2055 also in Güney Afrika. He is using PhoneCopy for backup of kişiler.
- 1.12.2019
- User from Bangladeş has synchronized kişiler with his phone.
dünya genelindeki Nokia Asha 2055 kullanıcıları
Nokia Asha 2055, PhoneCopy kullanıcıları tarafından Güney Afrika (Suid-Afrika, iNingizimu Afrika, uMzantsi Afrika, Afrika-Borwa, Afrika Borwa, Aforika Borwa, Afurika Tshipembe, Afrika Dzonga, iSewula Afrika) - 78.95%, Bangladeş (বাংলাদেশ) - 15.79%, Madagaskar (Madagasikara) - 5.26% gibi ülkelerde sıklıkla kullanılmaktadır.
Haritada
Harita, dünya genelinde PhoneCopy ile kişi yedeklemesi için Nokia Asha 2055 kullanımını göstermektedir.
Talimat metni - Nasıl yedekleme yapılır
Nokia Asha 2055 ile
- Choose Menu - Settings - Configuration - Personal config. sett..
- Press Options and choose Add new - Synchronization and configure given fields.
▼ hide fields
- Account name: Write PhoneCopy and press OK.
- Server address: Write http://www.phonecopy.com/sync and press OK.
- User name: your_username
- Password: your_password
- Contacts database: To Database address write contacts. Do not fill in any user name or password. Press Back.
- Calendar database: To Database address write calendar. Do not fill in any user name or password. Press Back.
- Notes database: To Database address write notes. Do not fill in any user name or password. Press Back.
- Use pref. access pt.: Choose Yes,If you want to use your preferred access point GPRS to connect to PhoneCopy. otherwise choose No, and set up the access point at your operator.
- Press Back, go to the name of the profile you have just created, and press Options and choose Activate.
- Press twice Back and choose Sync and backup - Data transfer.
- Find Server sync, press Options and choose Edit.
- Choose Synchronized data mark the items you want to synchronize and press Done or Back.
- Press twice Back.
- Now you can start the synchronization with Phonecopy, press Server sync.
If you need more help with the settings, visit our step by step screenshot guide.
Ve lütfen şimdi, Telefonunuzu PhoneCopy hesabınıza atama işlemini yapınız
Senkronizasyon esnasında herhangi bir problemle karşılaşırsanız Yardım İsteyin