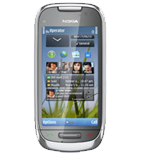
Nokia C7-00 (Astound) dan yedeklenen kişiler, takvim, görevler, notlar ve call logs

Available guides for synchronization to the secure cloud
Supported functions
- Kişiler senkronizasyonu
- Takvim senkronizasyonu
- görev senkronizasyonu
- Notlar senkronizasyonu
- call log backup
Nokia C7-00 (Astound) cihazını PhoneCopy desteklenmektedir. Please note that following settings may vary a little depending on the firmware version.
Confirmed models
News
- 20.08.2023
- Someone just used PhoneCopy for backup of Nokia C7-00 (Astound) in country Switzerland. His kişiler were backed up.
- 2.04.2022
- Someone used PhoneCopy for backup of this phone model in Kenya. His kişiler were transferred.
- 11.01.2022
- A new phone user has synchronized his kişiler to PhoneCopy from Russia.
- 21.04.2020
- Recently we got new user of Nokia C7-00 (Astound) also in Yunanistan. He is using PhoneCopy for backup of kişiler.
- 5.12.2019
- Someone just used PhoneCopy for backup of Nokia C7-00 (Astound) in country Egypt. His kişiler were backed up.
Nokia C7-00 (Astound) users around the world
According to our statistics, PhoneCopy users use Nokia C7-00 (Astound) for data backup in countries Almanya (Deutschland) - 89.04%, Yunanistan (Hellas, Ελλάς, Ellada, Ελλάδα) - 2.74%, Kenya - 2.74%, Egypt (Misr, Masr, مصر) - 2.74%, Switzerland (Schweiz, Suisse, Svizzera, Svizra) - 1.37%, Russia (Rossiya, Rossiâ, Россия) - 1.37%.
On the map
Histogram depicts Nokia C7-00 (Astound) backup with PhoneCopy around the world.
Talimat metni - Nasıl yedekleme yapılır
Nokia C7-00 (Astound) ile
First go to the phone's Main Menu and then follow these steps:
- Select Settings, then Connectivity. Under Connectivity select Data transfer and afterwards Sync.
- Click Option and select New sync profile.
- Click Start and in Profile name write PhoneCopy, then as Server version select 1.2.
- Tick the items you want to back up:
▼ hide contacts
- Contact database: contacts
▼ hide calendar- Calendar database: calendar
▼ hide notes- Notes database: notes
- Then configure given fields.
▼ hide fields
- Data bearer: Internet
- Host address: write http://www.phonecopy.com/sync
- Server ID: leave blank
- User name: your_username
- Password: your_password
- Choosing Yes will activate your new synchronization profile.
Congratulations!
Now, you can start syncing with PhoneCopy and get your phone backed up!
Remember, you need to sync your phone first. On your phone, in section Sync, click Options and select Synchronize.
If you need more help with the settings, visit our step by step screenshot guide.
Ve lütfen şimdi, Telefonunuzu PhoneCopy hesabınıza atama işlemini yapınız
Senkronizasyon esnasında herhangi bir problemle karşılaşırsanız Yardım İsteyin

