Samsung B5310 dan yedeklenen kişiler, takvim, görevler ve notlar
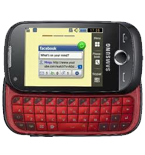
Güvenli buluta senkronizasyon için mevcut kılavuzlar
Desteklenen işlevler
- Kişiler senkronizasyonu
- Takvim senkronizasyonu
- görev senkronizasyonu
- Notlar senkronizasyonu

kişiler, takvim, görevler ve notlar verilerinizi Samsung B5310 cihazından çevrimiçi bir depolama alanına ve geri aktararak güvende ve güncel tutun.
Samsung B5310 cihazını PhoneCopy desteklenmektedir.
Lütfen aşağıdaki ayarların ürün yazılımı sürümüne bağlı olarak biraz değişebileceğini unutmayın.
Onaylanan modeller
Onaylanan sürümler
Talimat metni - Nasıl yedekleme yapılır
Samsung B5310 ile
Talimatlar henüz sizin konuşma dilinize çevrilmemiştir.
First go to the phone's Main Menu and then follow these steps:
- Select Synchronize and choose Add.
- Configure given fields.
▼ hide fields
- Profile name: write PhoneCopy
- Synchronization category: Select the items you would like to synchronize. All will synchronize all items.
- Contacts
- to remote contacts write contacts, the rest can be left blank
- Plan
- to remote calendar write calendar, the rest can be left blank
- Task
- to remote task write tasks, the rest can be left blank
- Notes
- to remote notes write notes, the rest can be left blank
- Synchronization type: select Complete synchronization
- Synchronization server:
- Address
- write http://www.phonecopy.com/sync
- Login ID
- your_username
- Password
- your_password
- Save the data.
- Go to section Synchronise, select PhoneCopy profile and press OK to start the synchronization.
Ve lütfen şimdi, Telefonunuzu PhoneCopy hesabınıza atama işlemini yapınız
Senkronizasyon esnasında herhangi bir problemle karşılaşırsanız Yardım İsteyin