Mac OSX CalDav setting guide
If you are a Mac OSX user and want to keep your contact and calendar data synchronised also with other devices, we have prepared a short guide for you. So, let’s go through on how to set up CalDav to synchronize your calendar items on your Mac and how to synchronize your contact data by CardDav. You can set CardDAV the same way as CalDAV.
Further help and advices are on page How to
How to start?
You will need a Mac. Let us just remind you that CalDav works for Calednar only. There is a similar CardDav setting for Contacts. The list of officially supported devices is here.
Create DAV device in your web profile
Login to your account, go to Settings -> Devices. Click on Set up a DAV device
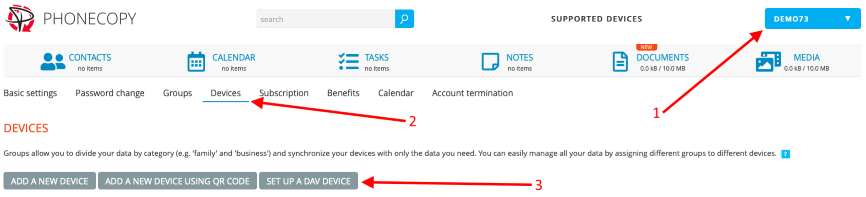
Please open menu (1), select Settings, click on the tab Devices
(2) and then click on the button SET UP A DAV DEVICE (3). The following dialog appears.
Name your device. See the DAV URL being generated for you. You will need this to finish the steps below.
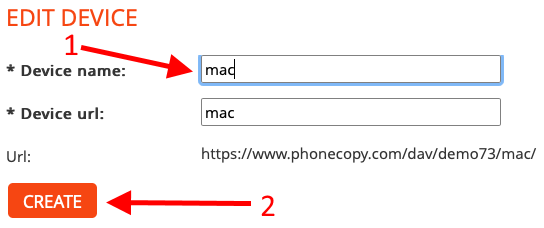
Please enter name of a DAV device, e.g. 'mac' (1) and click on the button CREATE (2). DAV device called 'mac' is created on your PhoneCopy account.
Set calendar synchronization
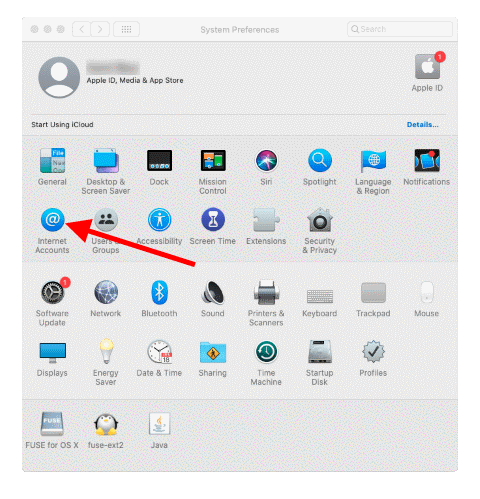
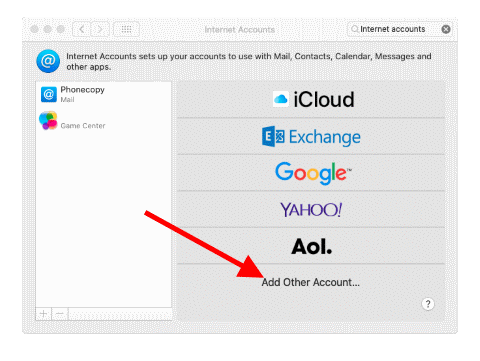
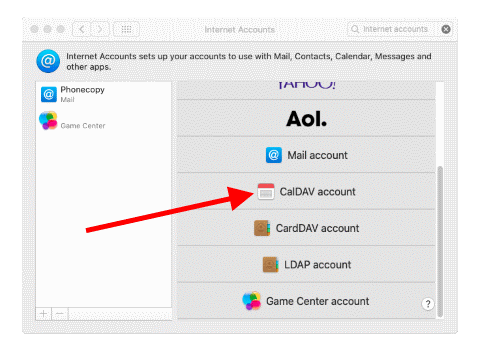
For setting up the CalDav synchronisation on your Mac go to System Preferences and select Internet Accounts. Select Add Other Account from the list.
Please do the following:
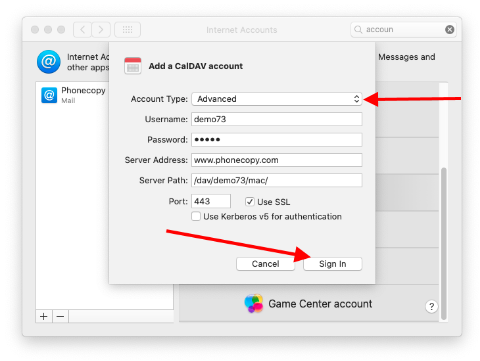
* Select Advanced Account Type.
* Enter username and password to your PhoneCopy account.
* Enter 'www.phonecopy.com' as Server Address.
* Enter '/dav/USER/NAME/' as Server Path where USER is your username and NAME is the name of the DAV device created above (e.g. 'mac').
* Enter 443 as Port.
* Check Use SSL.
* Click on the button Sign In.
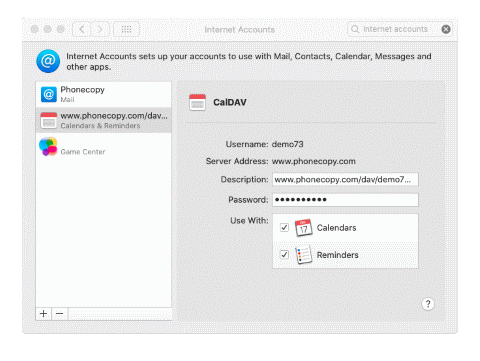
A New CalDAV account connected to your PhoneCopy account is created on your Mac.
After you are signed in just select if you want use it with Calendars and Remiders as well.
And now your calendar will be automatically synchronized and will work without any action required from you.