Backup контакты, календарь, задачи and записки from Nokia 500
Available guides for synchronization to the secure cloud
Supported functions
- contact synchronization
- calendar synchronization
- task synchronization
- note synchronization
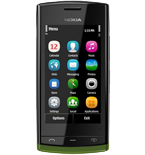
Nokia 500 is supported on PhoneCopy. Please note that following settings may vary a little depending on the firmware version.
Confirmed models
News
- 01.07.2024
- Someone used PhoneCopy for backup of this phone model in South Africa. His контакты were transferred.
- 28.04.2023
- Someone just used PhoneCopy for backup of Nokia 500 in country Romania. His контакты were backed up.
- 16.04.2022
- Someone just used PhoneCopy for backup of Nokia 500 in country Iran. His контакты were backed up.
- 29.03.2022
- We detected PhoneCopy app on Nokia 500 phone in Syria. All контакты were backed up.
- 03.12.2021
- We just got first user of this model in Bangladesh! Someone just backed up his контакты.
Nokia 500 users around the world
Nokia 500 is preffered for contact backup by PhoneCopy users in several countries around the world - Syria (Suriyah, سورية) - 45.74%, Egypt (Misr, Masr, مصر) - 31.91%, United States (Estados Unidos, États-Unis, ‘Amelika Hui Pū ‘ia) - 11.70%, Bangladesh (বাংলাদেশ) - 5.32%, Greece (Hellas, Ελλάς, Ellada, Ελλάδα) - 1.06%, South Africa (Suid-Afrika, iNingizimu Afrika, uMzantsi Afrika, Afrika-Borwa, Afrika Borwa, Aforika Borwa, Afurika Tshipembe, Afrika Dzonga, iSewula Afrika) - 1.06%, Romania (România) - 1.06%, Iran (Īrān, ایران) - 1.06%, Poland (Polska) - 1.06%.
On the map
The map shows usage of Nokia 500 for contact backup with PhoneCopy around the world.
Text guideline - How to backup
With Nokia 500
First go to the phone's Main Menu and then follow these steps:
- Select Settings, then Connectivity. Under Connectivity select Data transfer and afterwards Sync.
- Click Option and select New sync profile.
- Click Start and in Profile name write PhoneCopy, then as Server version select 1.2.
- Tick the items you want to back up:
▼ hide contacts
- Contact database: contacts
▼ hide calendar- Calendar database: calendar
▼ hide notes- Notes database: notes
- Then configure given fields.
▼ hide fields
- Data bearer: Internet
- Host address: write http://www.phonecopy.com/sync
- Server ID: leave blank
- User name: your_username
- Password: your_password
- Choosing Yes will activate your new synchronization profile.
Congratulations!
Now, you can start syncing with PhoneCopy and get your phone backed up!
Remember, you need to sync your phone first. On your phone, in section Sync, click Options and select Synchronize.
If you need more help with the settings, visit our step by step screenshot guide.
And now please, assign your phone to your PhoneCopy account.
In the case of problems with synchronization, please contact us.